- Joined
- Nov 10, 2007
- Messages
- 3,824
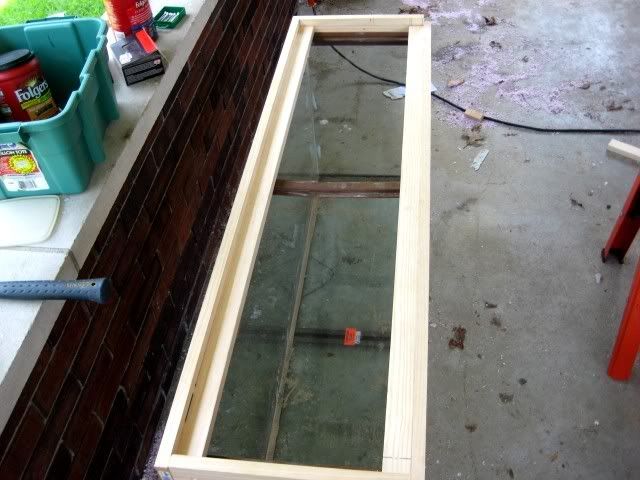
Me and my dad wanted a sliding lid for my 70gal tank (this will work for any size tank) so we called Zilla, who didn't have any and when we mentioned just building our own, they said it was impossible. So, here's the "impossible" sliding lid we built with step by step pics & video.
Originally it was going to be a split tank but I decided not to split it. I want more floor space for my newest big female T. Blondi (it's a tall tank but I will be adding foam below the thick substrate to make it safe for the Blondi). Hope you can follow this...it was a very complicated project....
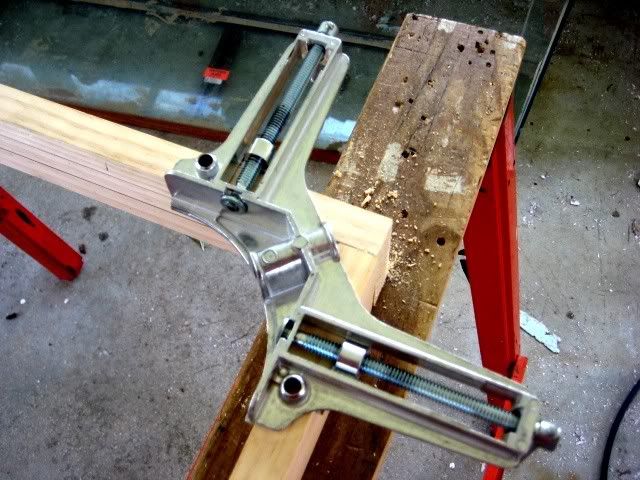
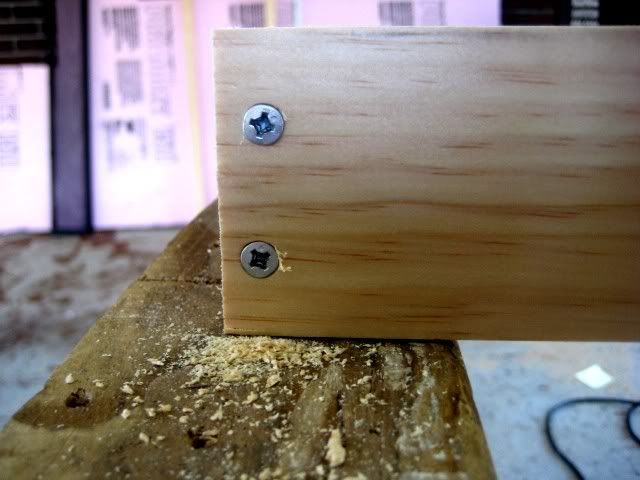
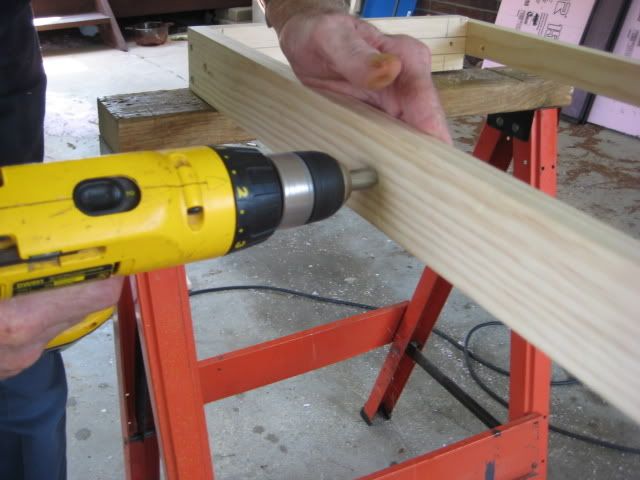
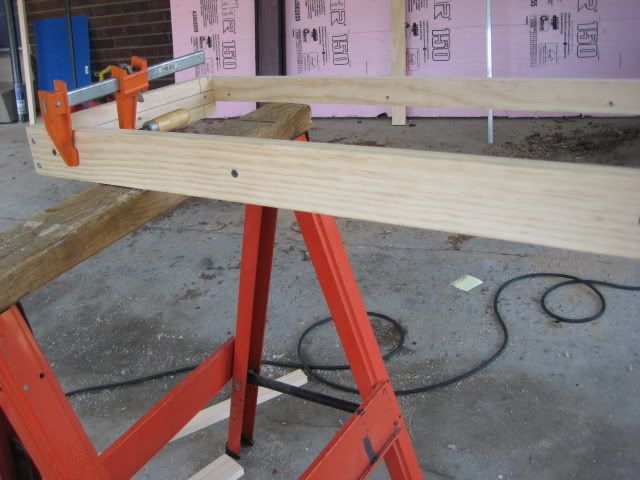
Step One:
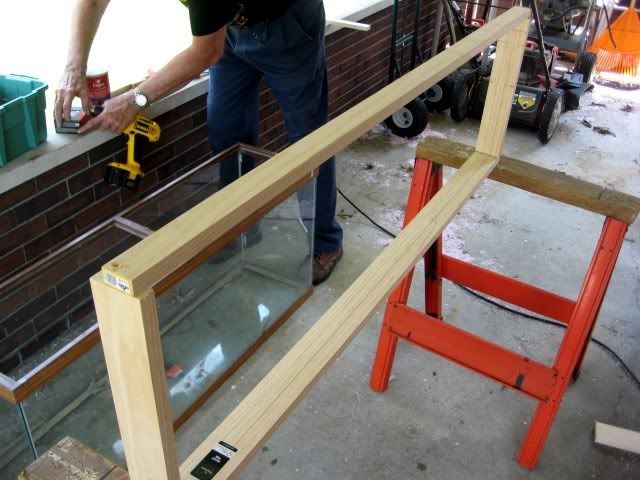
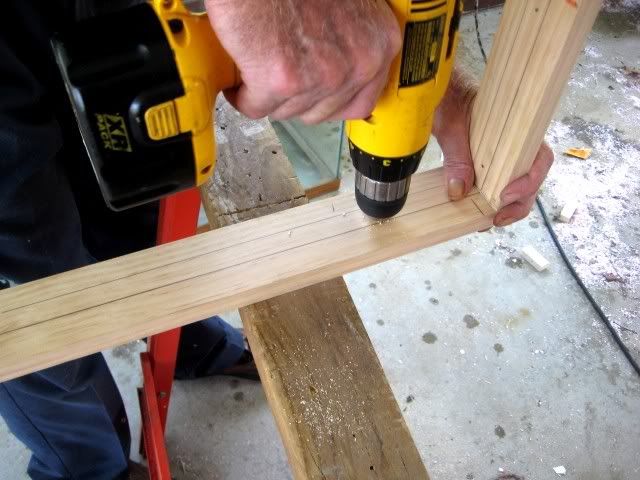
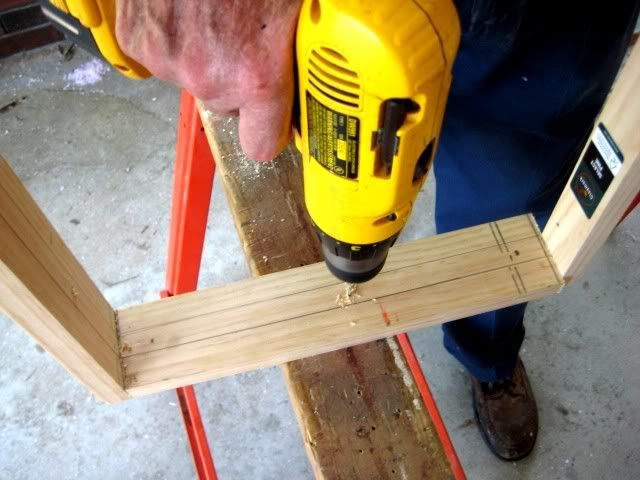
Get your wood cut to the proper lenghts of the back and sides of your tank. Hold the pieces in place (we had a special tool to do this) and drill holes into wood and connect all three pieces (back and sides). Counter-sink the holes (very important..do this on all holes drilled) and put your screws in (I use 2" screws to make sure it's very secure).

Step Two:
Measure and mark where the base for the sliding tray will go. Bascially this is where the sliding lid will rest.
Step Three:
Attach front piece - this will be the bottom of where your sliding tray rests and also the front of the lid - so measure carefully!
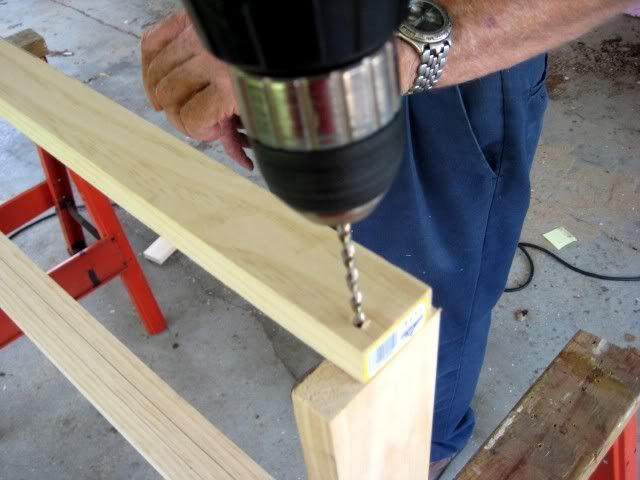
Step Four:
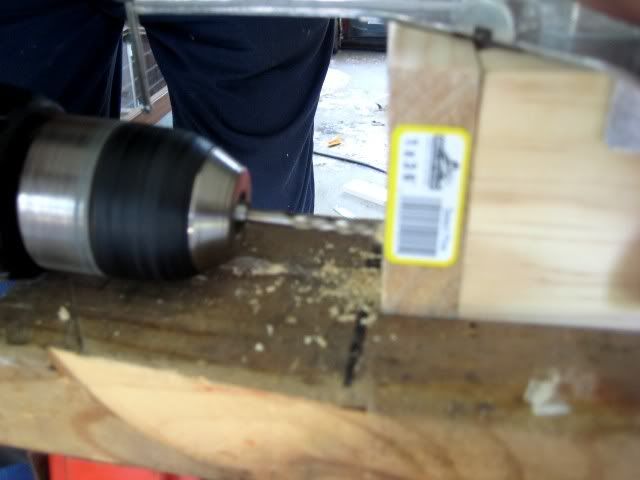
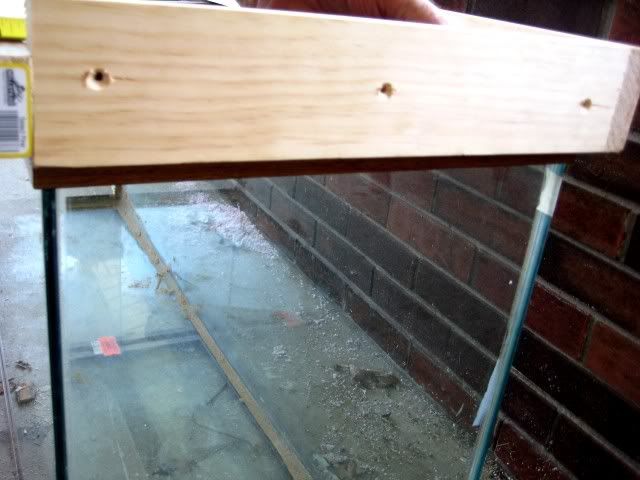
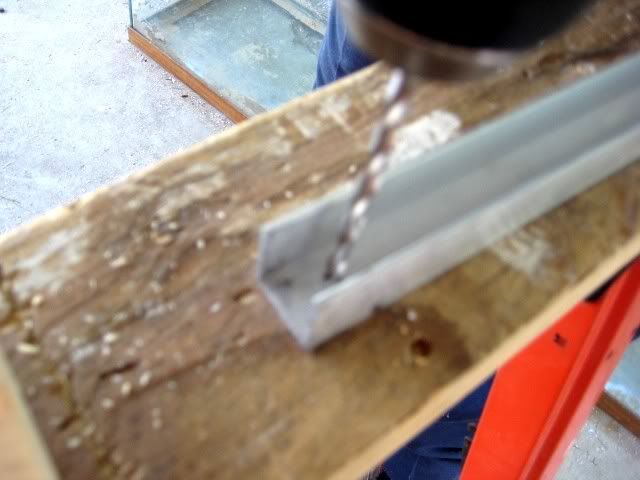
Drill holes in back and side portions of main frame in between the lines you measured for earlier to attach the sliding lid resting area.
Be sure to counter-sink your holes!!
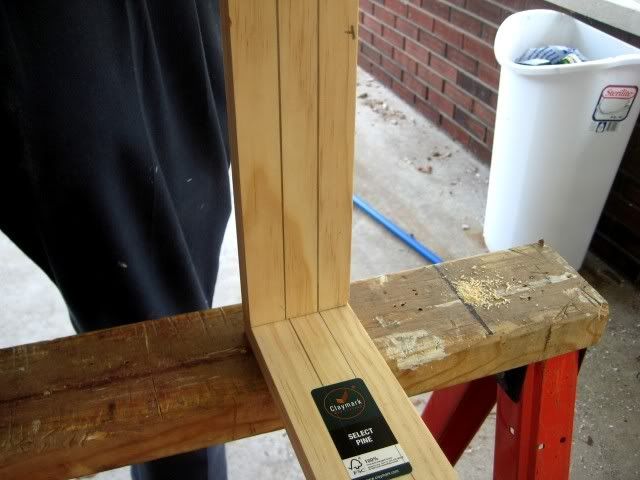
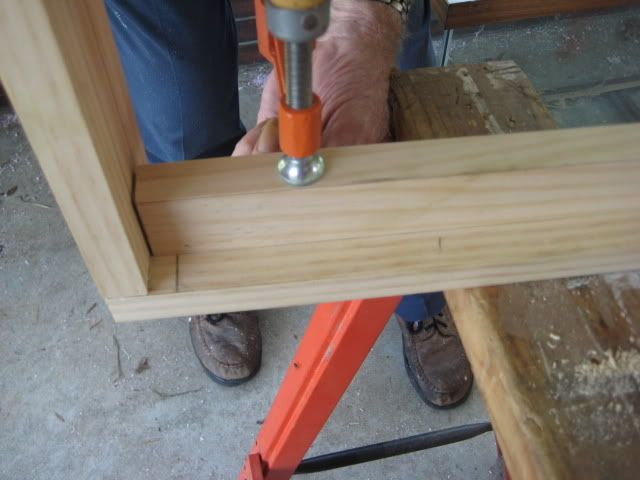
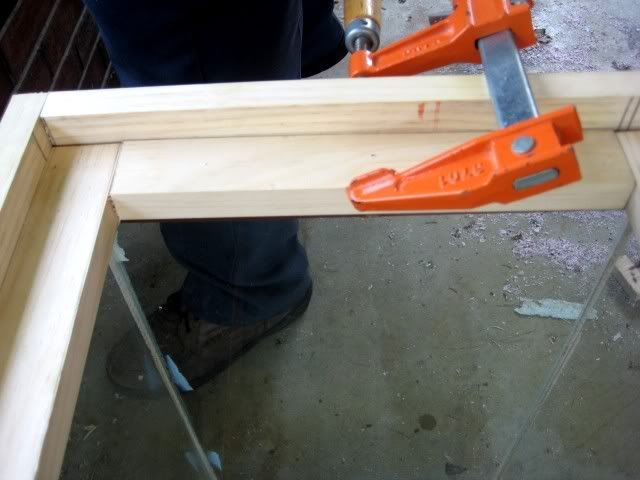
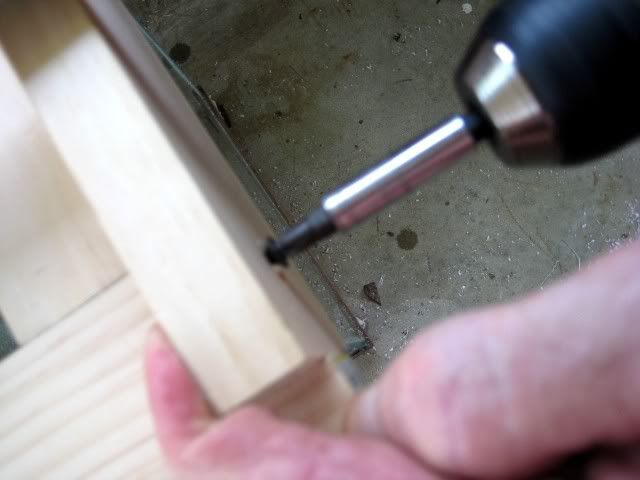
Step Five:
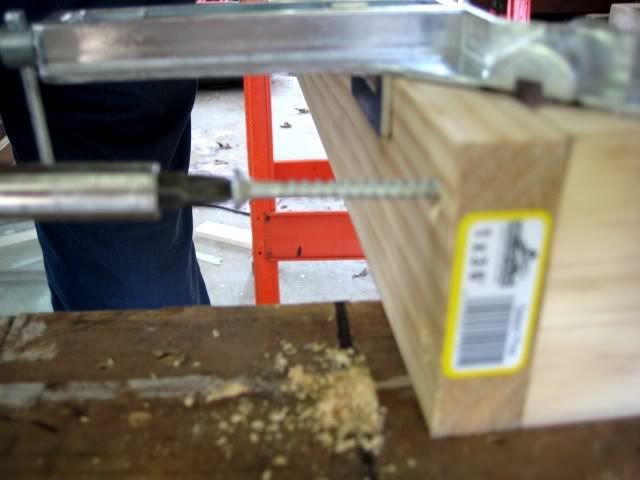
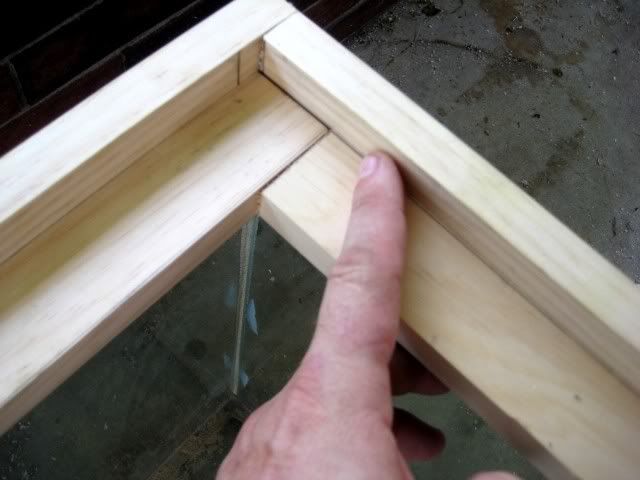
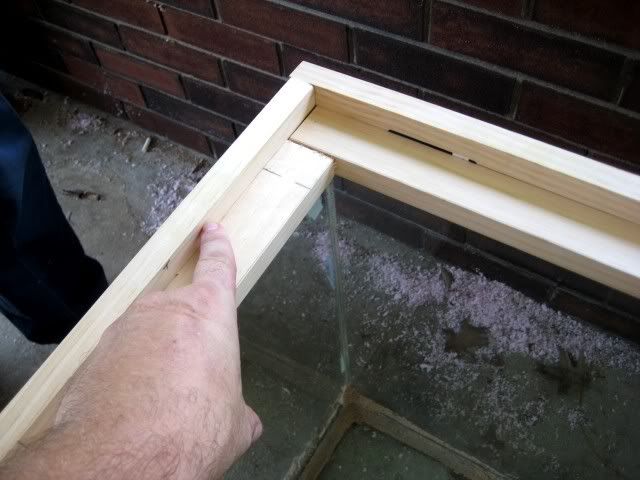
After all holes are drilled and counter-sunk, place your wood piece for the sliding lid resting area in place and use a C-Clamp to hold in place (if possible) while you insert screws on front and sides - this is where your lid will sit.

This shows where your lid will be sitting - this is the side portion:
Here's the back:
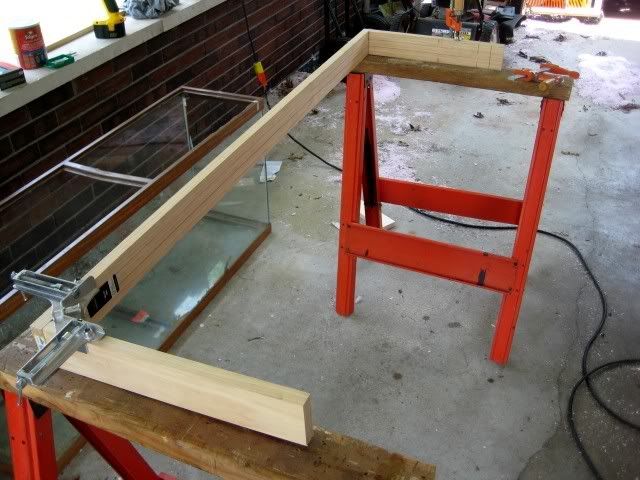
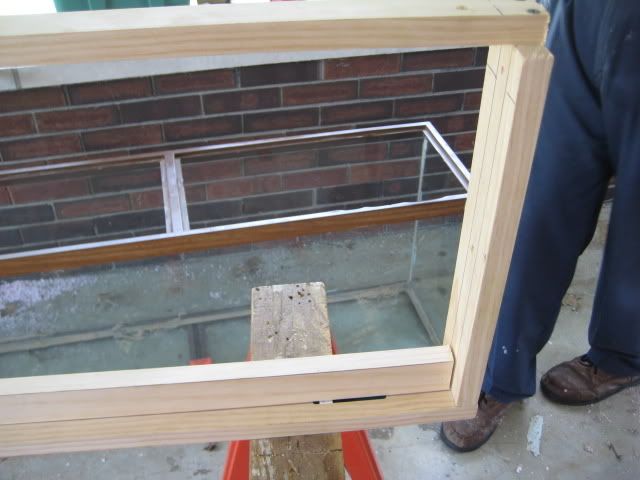
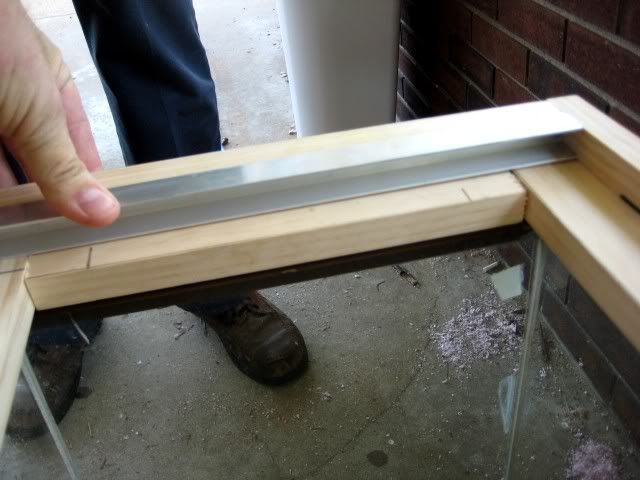
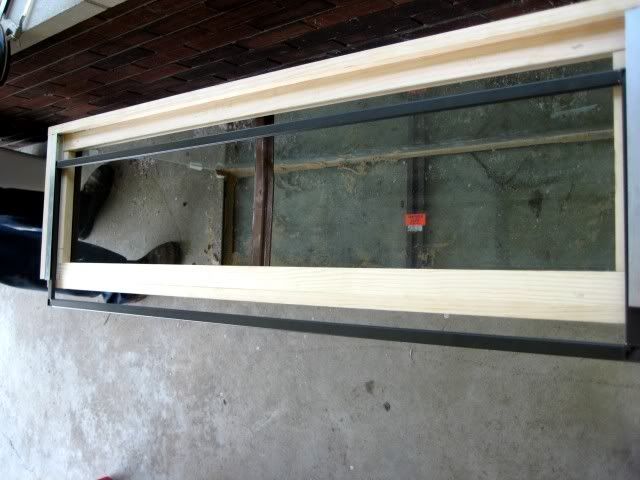
Here's an overview of how the lid looks at this point sitting on the tank without the sides pieces:
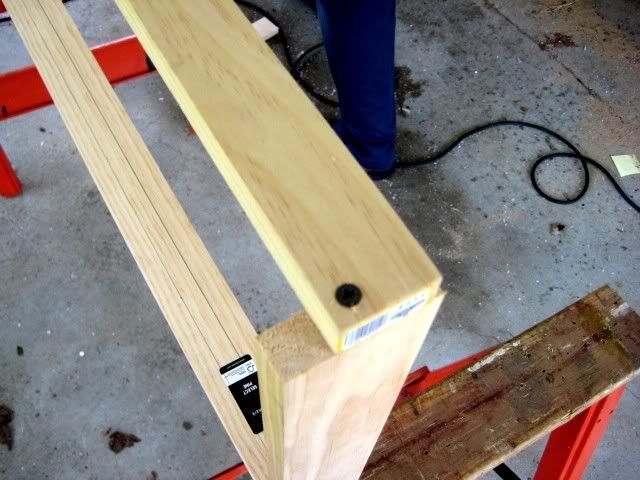
Step Six:
Drill holes for the side pieces the sliding lid will rest on:
Clamp the side pieces down inside the lines you measured earlier or to meet up with the back portion of lid resting area you've already installed and insert screws:
This is how it should look after sides are installed - this is the back right corner (back left should look identical):
Here's the back of the lid:
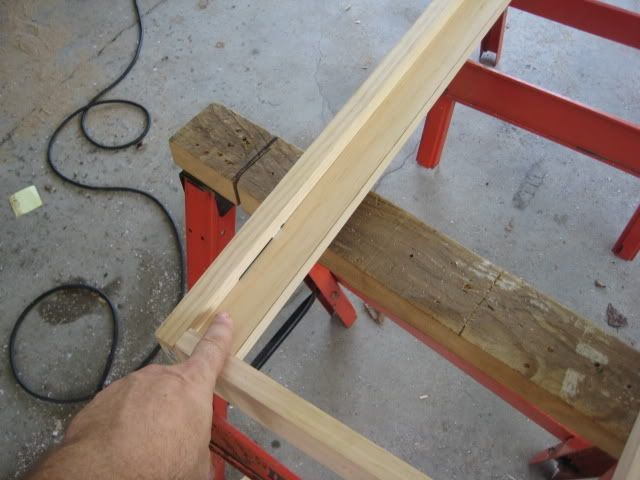
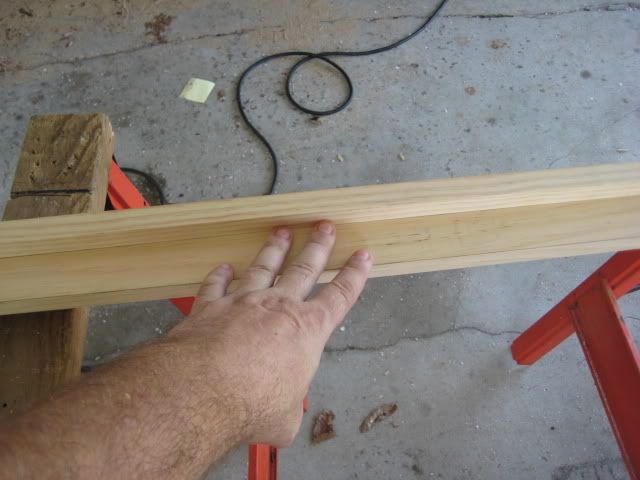
Step Seven:
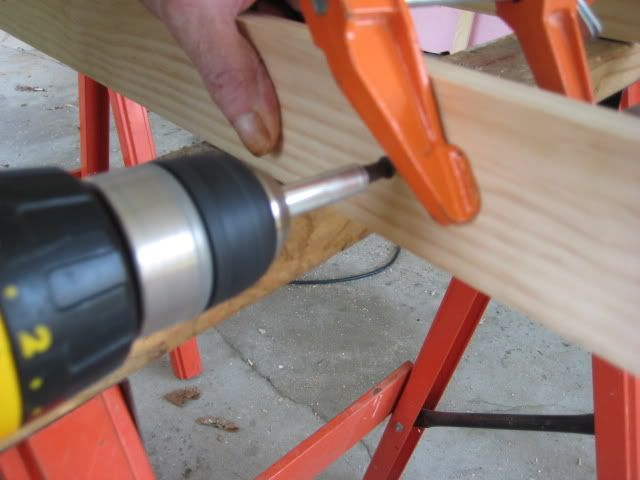
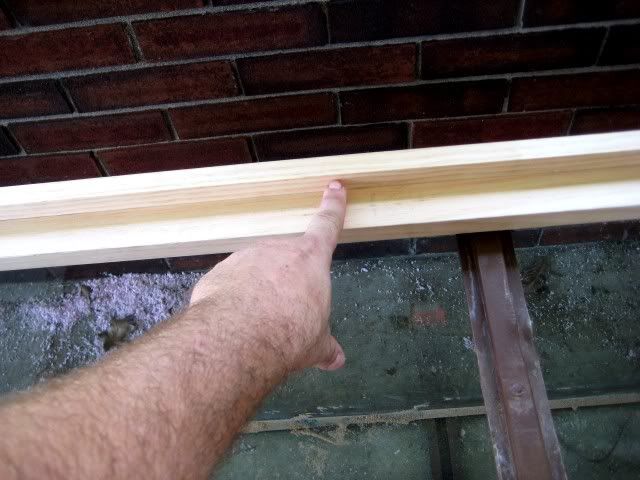
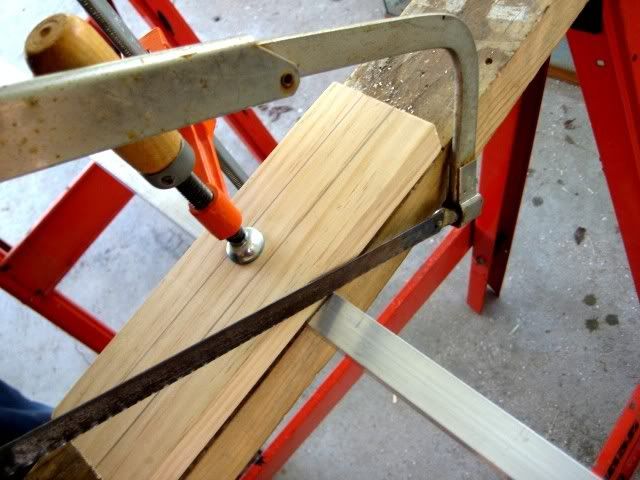
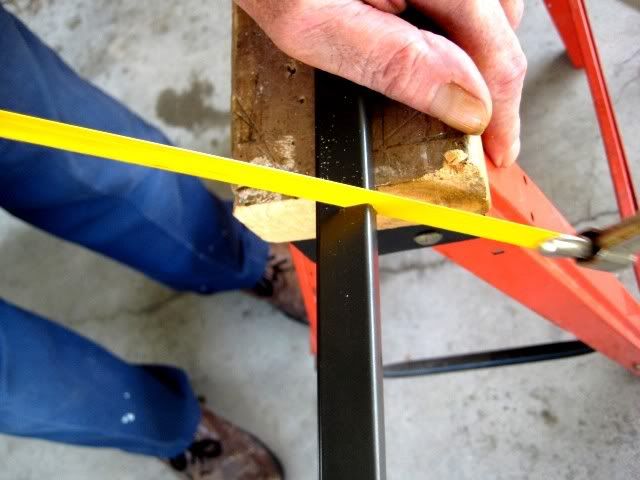
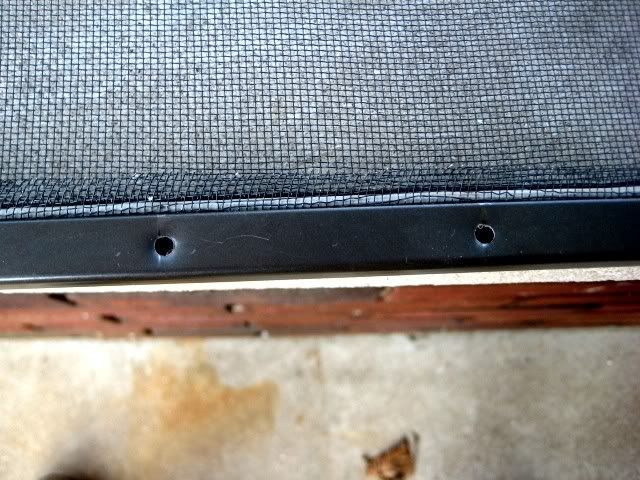
Cut tray guides to the correct size (will be the same length as your side piece) and drill holes for installation - be sure to counter-sink holes again:

Attach the tray guide with 3 small screws (depending on the size of your tank). Do this on both sides!
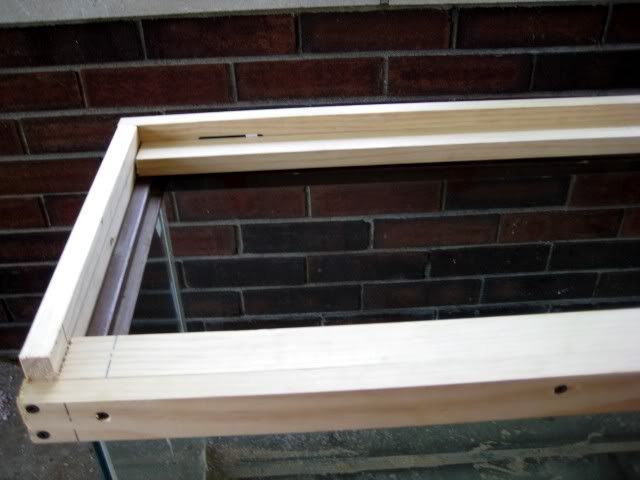
Step Eight:
Making the sliding screen frame. There is a kit at most hardwares store for this. You have four corners and you cut the frame to the width and length you need. Make your screen frame so it will slide easily in and out of the tray guides - be sure not too make it too tight or you could destroy your screen lid over time pulling on it.
Cut the screen frame:
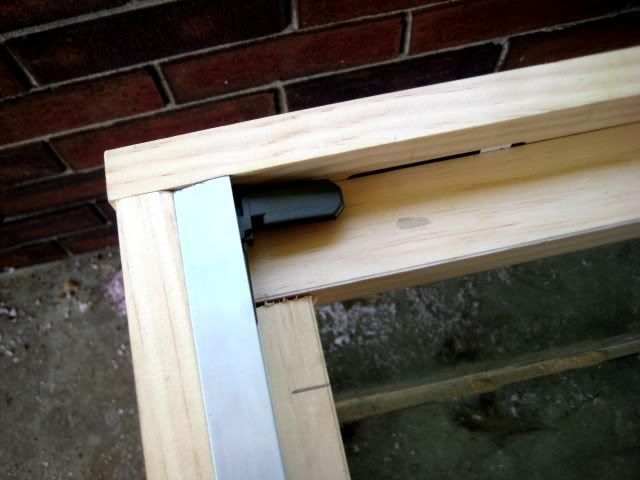
Insert corner pieces:

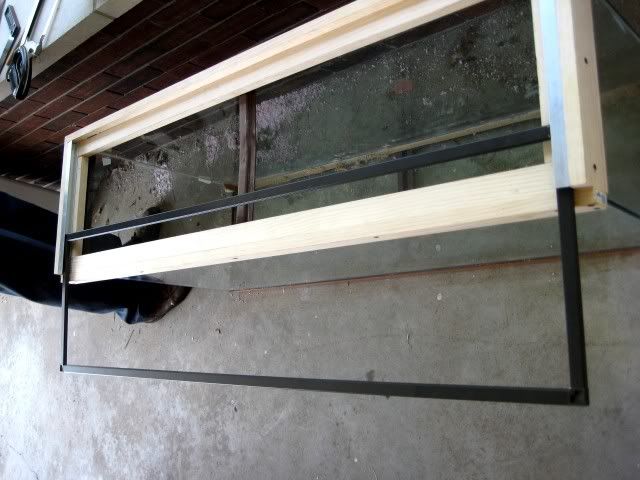
After you get the first piece cut and the corner piece attached, test it in the tray guide to be sure it fits:
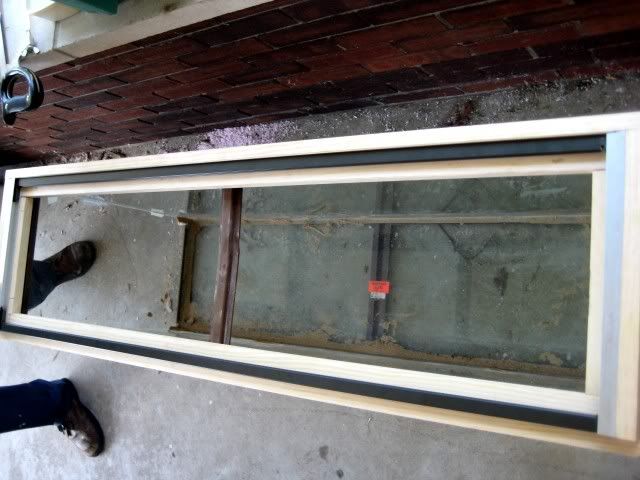
Check the length to be sure it fits there as well:
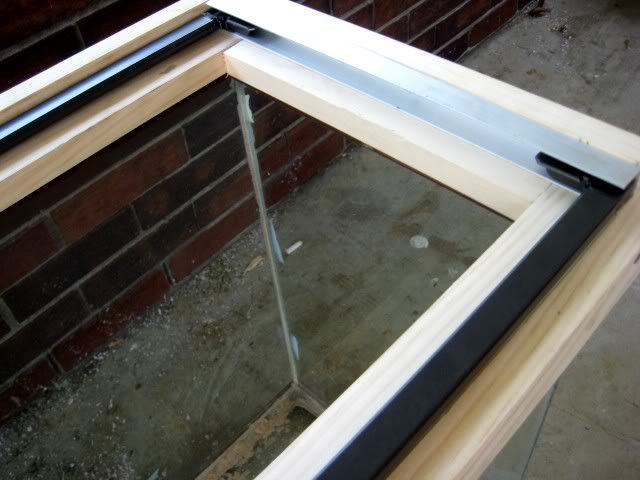
This is how it should look resting in the tray guides:
Here's a quick video showing the lid at this point (note: your screen lid will be somewhat floppy at this point without the screen in):
http://s234.photobucket.com/albums/...tion=view¤t=Enclosurelidtutorial_55.flv
Step Nine:
Putting the screen in the frame:
Cut your screen so there's about 6" of overlap on each side. Use a Screen Spline Roller tool (available at most hardware stores) to fit the screen spline into the space around the frame holding the screen in place.
Here's a couple of video's showing us doing this:
http://s234.photobucket.com/albums/...tion=view¤t=Enclosurelidtutorial_56.flv
http://s234.photobucket.com/albums/...tion=view¤t=Enclosurelidtutorial_61.flv
Step Ten:
Cut off the excess screen:
http://s234.photobucket.com/albums/...tion=view¤t=Enclosurelidtutorial_62.flv
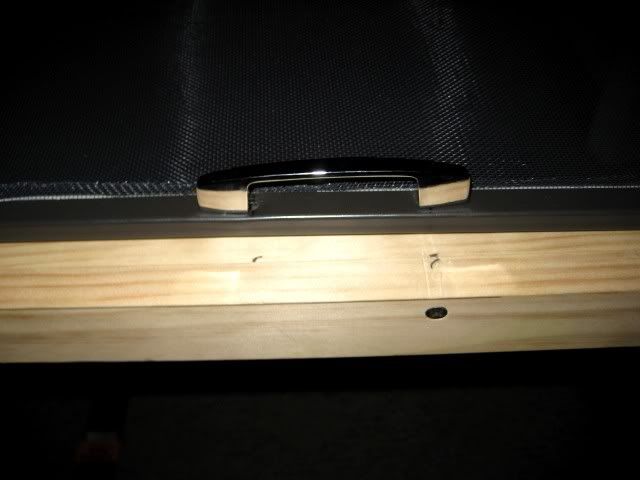
Step Eleven:
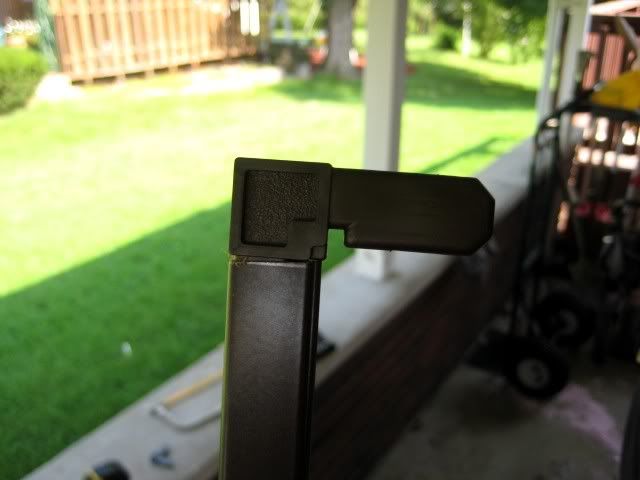
Drill holes for handles and install. I used two handles but my tank is 4' long - you can use one if it's a 5-20gal tank.
Here's the finished product!
http://s234.photobucket.com/albums/...tion=view¤t=Enclosurelidtutorial_64.flv
Hope you guys enjoyed! Let me know if you have any questions - I know it's a lot of info....Thanks! Rob
Originally it was going to be a split tank but I decided not to split it. I want more floor space for my newest big female T. Blondi (it's a tall tank but I will be adding foam below the thick substrate to make it safe for the Blondi). Hope you can follow this...it was a very complicated project....
Step One:
Get your wood cut to the proper lenghts of the back and sides of your tank. Hold the pieces in place (we had a special tool to do this) and drill holes into wood and connect all three pieces (back and sides). Counter-sink the holes (very important..do this on all holes drilled) and put your screws in (I use 2" screws to make sure it's very secure).
Step Two:
Measure and mark where the base for the sliding tray will go. Bascially this is where the sliding lid will rest.
Step Three:
Attach front piece - this will be the bottom of where your sliding tray rests and also the front of the lid - so measure carefully!
Step Four:
Drill holes in back and side portions of main frame in between the lines you measured for earlier to attach the sliding lid resting area.
Be sure to counter-sink your holes!!
Step Five:
After all holes are drilled and counter-sunk, place your wood piece for the sliding lid resting area in place and use a C-Clamp to hold in place (if possible) while you insert screws on front and sides - this is where your lid will sit.
This shows where your lid will be sitting - this is the side portion:
Here's the back:
Here's an overview of how the lid looks at this point sitting on the tank without the sides pieces:
Step Six:
Drill holes for the side pieces the sliding lid will rest on:
Clamp the side pieces down inside the lines you measured earlier or to meet up with the back portion of lid resting area you've already installed and insert screws:
This is how it should look after sides are installed - this is the back right corner (back left should look identical):
Here's the back of the lid:
Step Seven:
Cut tray guides to the correct size (will be the same length as your side piece) and drill holes for installation - be sure to counter-sink holes again:
Attach the tray guide with 3 small screws (depending on the size of your tank). Do this on both sides!
Step Eight:
Making the sliding screen frame. There is a kit at most hardwares store for this. You have four corners and you cut the frame to the width and length you need. Make your screen frame so it will slide easily in and out of the tray guides - be sure not too make it too tight or you could destroy your screen lid over time pulling on it.
Cut the screen frame:
Insert corner pieces:
After you get the first piece cut and the corner piece attached, test it in the tray guide to be sure it fits:
Check the length to be sure it fits there as well:
This is how it should look resting in the tray guides:
Here's a quick video showing the lid at this point (note: your screen lid will be somewhat floppy at this point without the screen in):
http://s234.photobucket.com/albums/...tion=view¤t=Enclosurelidtutorial_55.flv
Step Nine:
Putting the screen in the frame:
Cut your screen so there's about 6" of overlap on each side. Use a Screen Spline Roller tool (available at most hardware stores) to fit the screen spline into the space around the frame holding the screen in place.
Here's a couple of video's showing us doing this:
http://s234.photobucket.com/albums/...tion=view¤t=Enclosurelidtutorial_56.flv
http://s234.photobucket.com/albums/...tion=view¤t=Enclosurelidtutorial_61.flv
Step Ten:
Cut off the excess screen:
http://s234.photobucket.com/albums/...tion=view¤t=Enclosurelidtutorial_62.flv
Step Eleven:
Drill holes for handles and install. I used two handles but my tank is 4' long - you can use one if it's a 5-20gal tank.
Here's the finished product!
http://s234.photobucket.com/albums/...tion=view¤t=Enclosurelidtutorial_64.flv
Hope you guys enjoyed! Let me know if you have any questions - I know it's a lot of info....Thanks! Rob
