construction of our P. cambridgeii's new enclosure

curiousme

Arachnoprince
Old Timer
Joined
Dec 11, 2008
Messages
1,661
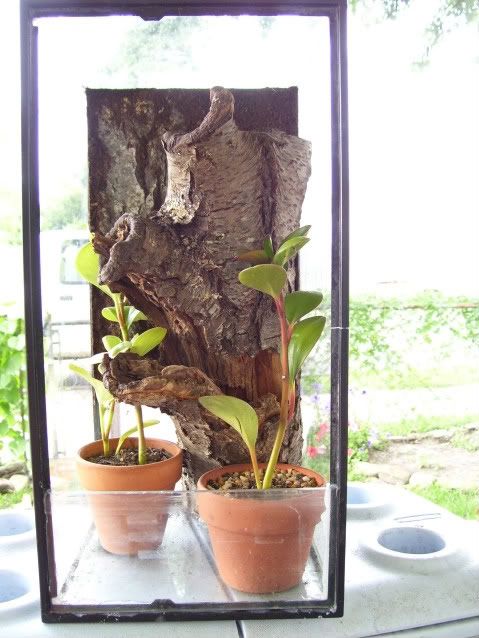
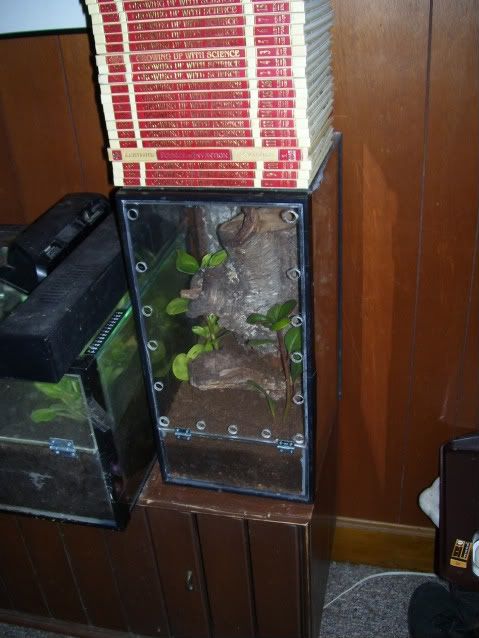
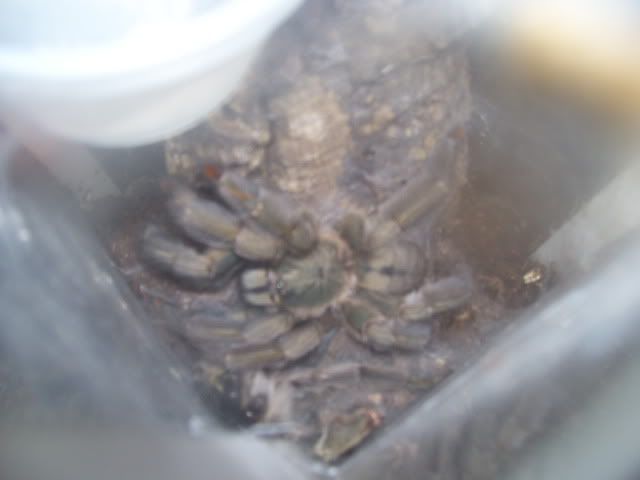
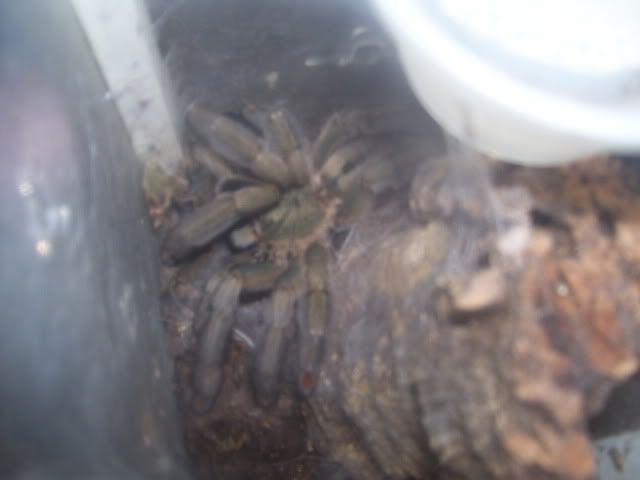
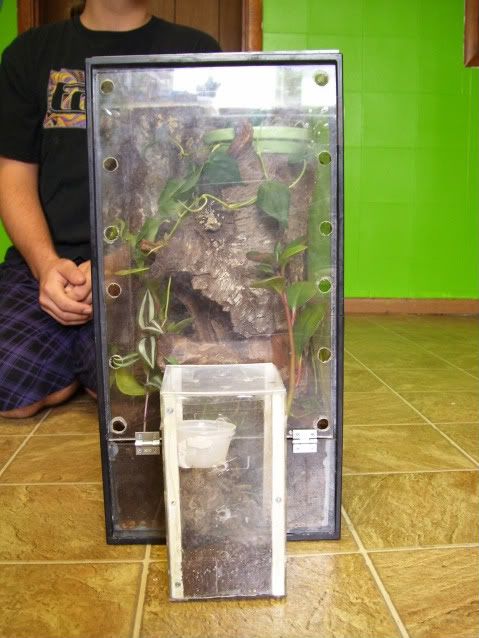
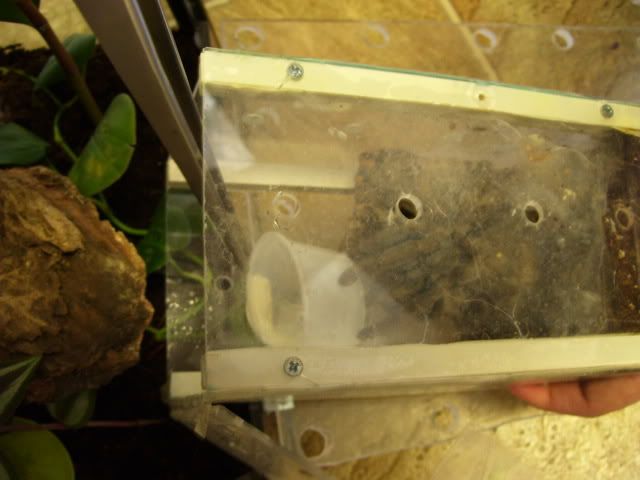
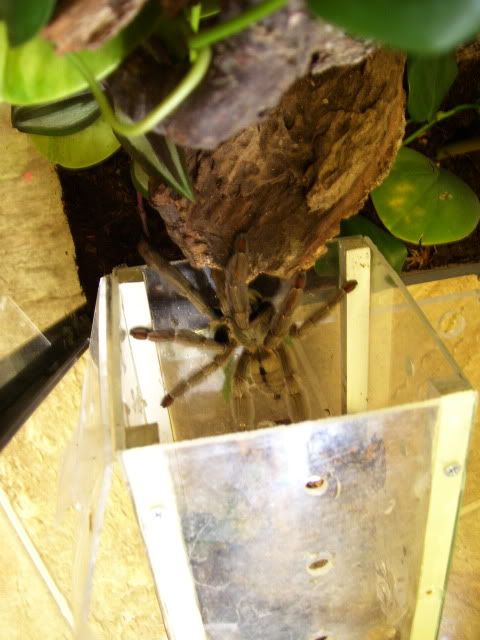
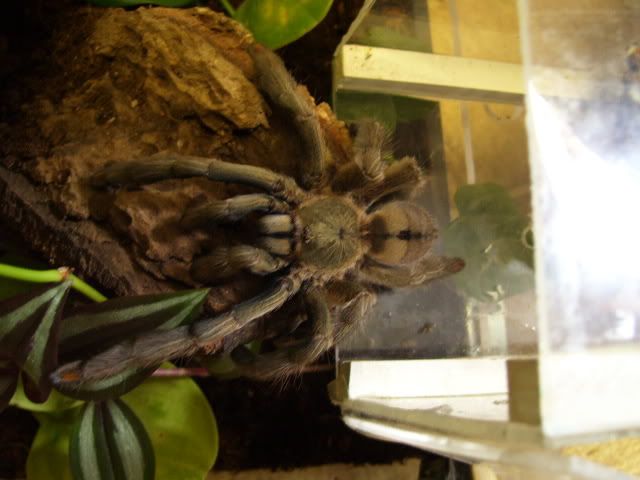
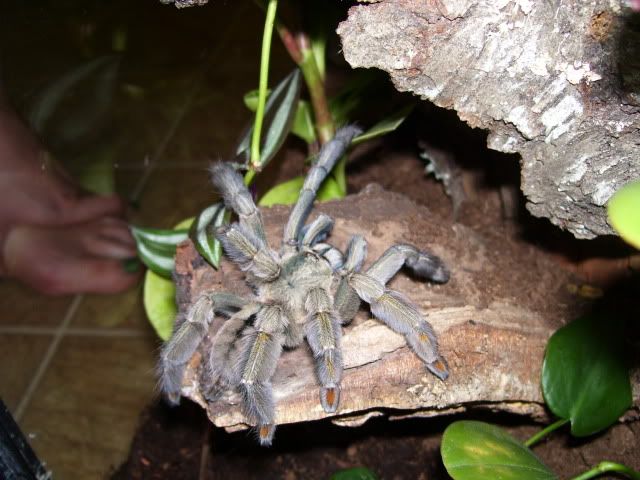
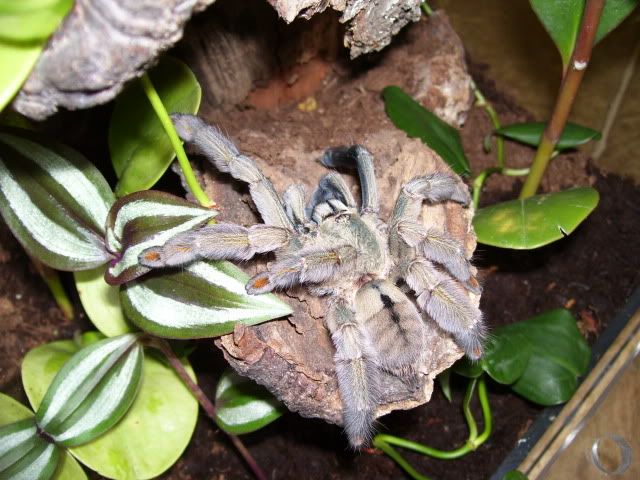
So, it is time to upgrade enclosures on our P. cambridgeii juvie. We have had her since late Nov. 2008(bought from paul@petcenterusa :) ), due to her extremely fast growth rate and speediness, we have decided to put her in her permanent adult enclosure now. Though it is a little big for her now, we figure in a couple of molts it will be perfect, and that way we won't have to rehouse her again in a few months.

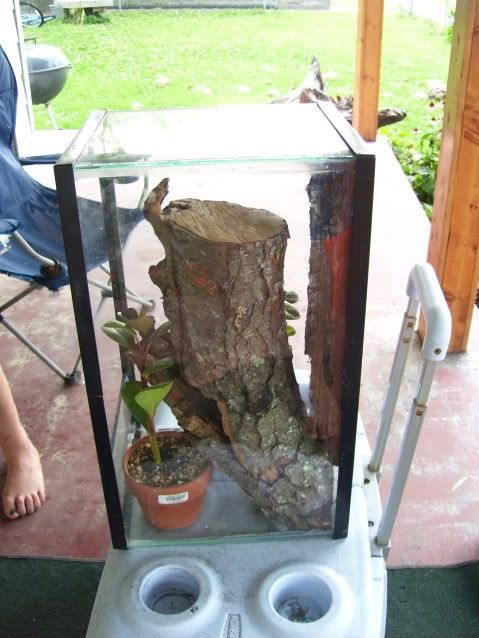
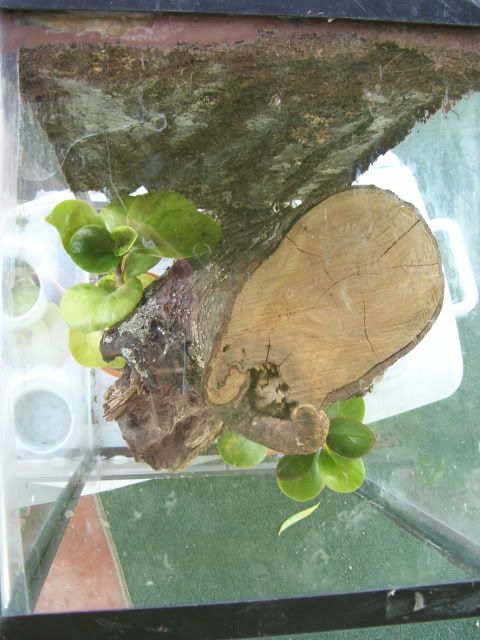
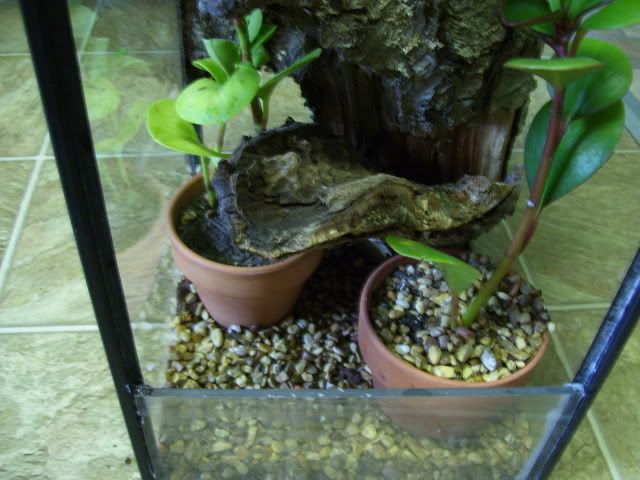
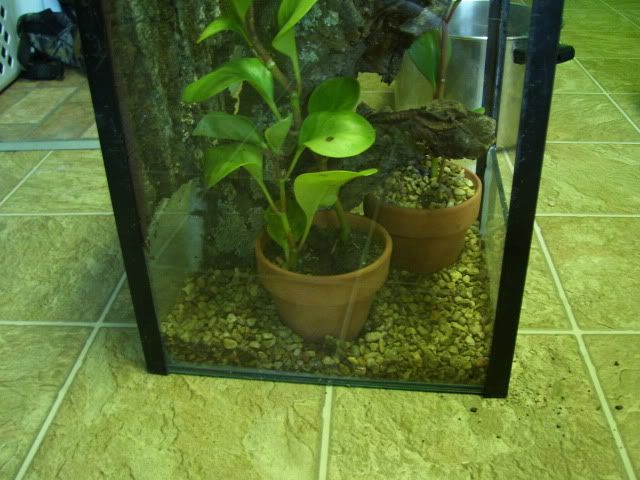
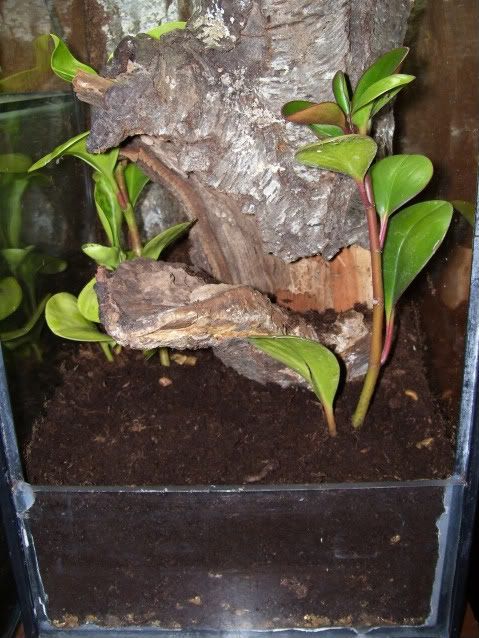
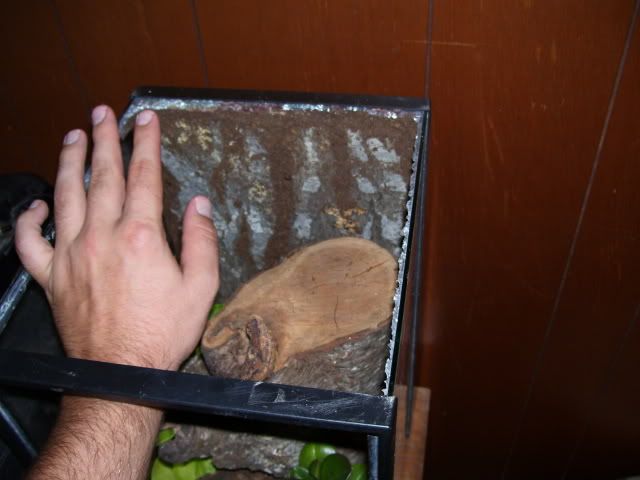
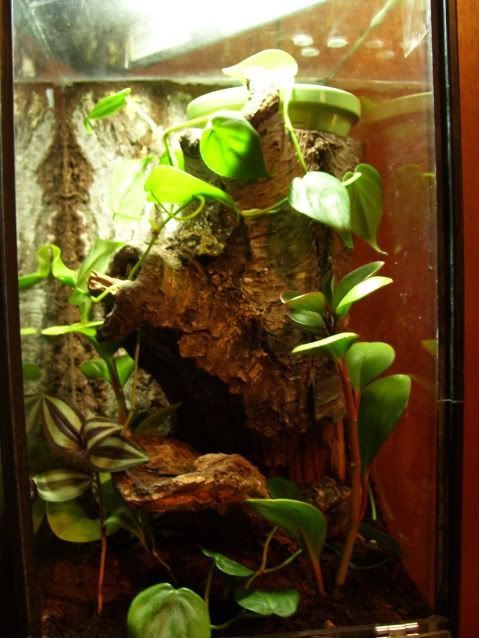
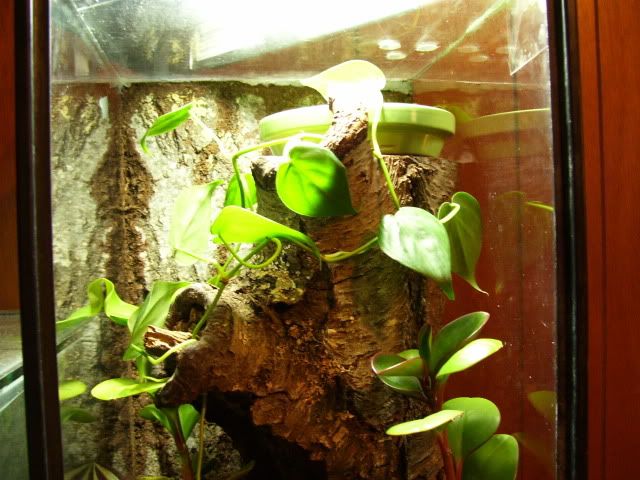
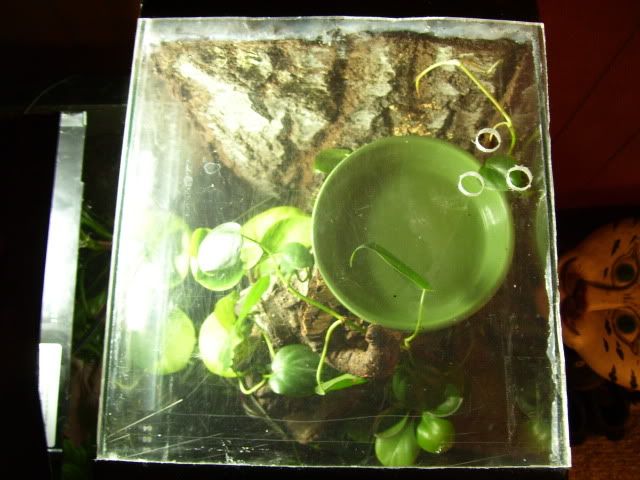
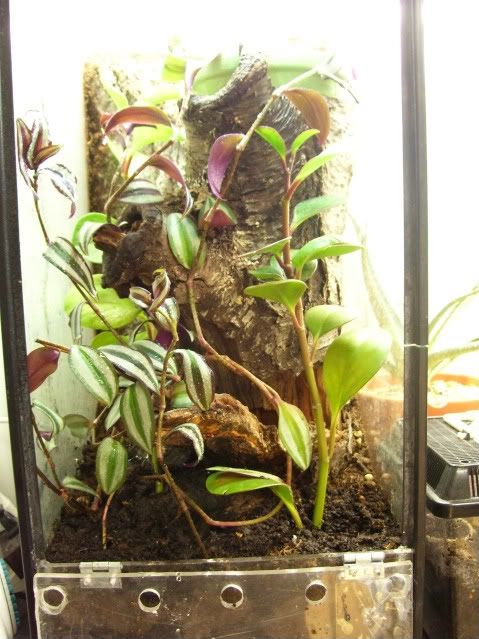
We have taken a 10 gallon fish tank and put a bark background on it. All bark and wood is collected from our own property, is free of pesticides and sufficiently sterilized. It is actually two pieces of bark that to our eyes look like they are from the same tree, but we tried to make it look like one continuous piece. We used a full tube of the dark brown caulk from Home Depot to secure it with. All cracks in the bark were then sealed from the front and covered with peat moss.


Mr. Gone

Arachnosquire
Old Timer
Joined
Nov 22, 2008
Messages
140
Step 2 & 3

Okay the next step was to add our centerpiece, a large-ish stump trimmed to fit. In my ambition, I forgot to take pictures of that step, but we used clear silicone to anchor it at the base. (as we had used up all of our brown, and this would be buried anyway)
then we added 2 of the plants (unlabeled low-light tolerant plants from wal-mart that i've kept for a couple of years). I kept them in pots to protect them should our P. cambridgeii decide she would still like to burrow some. Also, it helps control the water when watering the plants.
Then we attached the retaining wall
(a piece of scrap 1/4" plexi) on with more clear silicone.


This is where we'll put the water dish:


Spyder 1.0

Arachnoprince
Old Timer
Joined
Jan 7, 2007
Messages
1,014
That cage is going to be very heavy. If you drop it or knock it over the glass will shatter on the bottom. I suggest debarking the log carefully then hot glueing the pieces back together to reduce the weight 90%. I'm sure the Cambridgei will appreciate the extra hide as well.

Also, I don't think those plants will survive.. Don't they need a lot of light?? Pothos would work perfectly in this setup!


I see great potential here :D
 

Mr. Gone

Arachnosquire
Old Timer
Joined
Nov 22, 2008
Messages
140
adding substrate

Next we added a layer of gravel in the bottom, for drainage and humidity control.


Then we added the substrate, pure peat. We know it is a little bit more substrate than you would usually use for an arboreal, but she has shown she likes to burrow some too. Plus, it is also helpful in keeping the humidity controlled and hides the top of the pots.


We'll get pictures of the substrate from different angles, once it is the finished product.
 

Mr. Gone

Arachnosquire
Old Timer
Joined
Nov 22, 2008
Messages
140
That cage is going to be very heavy. If you drop it or knock it over the glass will shatter on the bottom. I suggest debarking the log carefully then hot glueing the pieces back together to reduce the weight 90%. I'm sure the Cambridgei will appreciate the extra hide as well.

Also, I don't think those plants will survive.. Don't they need a lot of light?? Pothos would work perfectly in this setup!


I see great potential here :D
Yes it is heavy, heavy enough NOT to get knocked over LOL! I mean a glass tank is gonna shatter if you drop it anyway. The piece of wood already has a built in hide, maybe you can see it in the substrate photos.

No, these plants don't need much light at all, but they will be getting a compact florescent bulb like all of our adult tanks. We keep live plants in all adult set-ups, (pothos, sansiveria, wandering jew, nephthytis, bromeliad, live moss and many more ) and we've never had problems related to it.
I've been keeping plants for years, and as long as you provide what they need they won't give you any problems; just like T's;) The key is balancing, and as planted fish-tank hobbyists for years, we have the experience.

T's are a lot like plants to my mind, in that I like similar things about keeping each. (their patience-rewarding, slowed down, simple way of life, for example) In any event, we cannot imagine keeping full grown T's without plants, since making a detailed, naturalistic enclosure is a huge part of the addiction for us. We think the correct match can always be made between plant and T with enough research and patience, and a balanced ecosystem can be achieved with the right maintenance.
 

curiousme

Arachnoprince
Old Timer
Joined
Dec 11, 2008
Messages
1,661
oops!

Well, for anyone out there who thinks these kinds of projects go off without a hitch; think again. Accidents happen, and when disaster strikes, you have to keep going.
As we were drilling a hole in the glass above where the water dish will go to allow for easy refilling, the whole top shattered!!!!!! Not sure what caused the break as we used a glass cutting bit that we've used to drill some 3 dozen holes before.
The glass fractured into hundreds of pieces, but stayed in place and didn't fall except for a few large pieces that all fell in the cup we had placed under the drill site to catch debris.
Then with some careful bag maneuvering, and the use of a large scrap of plexi-glass, we managed to remove all the broken glass and only drop a few larger pieces onto the substrate which were easily removed with tongs. Whew! Talk about an exorcise in patience!


So we cut a replacement panel out of 1/4" plexi, put the refill/cross-ventilation holes in, siliconed it to the top, put some weight on it and are waiting for it to dry. Also you can see the door in this pic which we used more 1/4" plexi for.


Our P. cambridgeii just molted a week ago tomorrow, so when she's ready, more pics with the finishing touches will follow after we feed and rehouse her!
 

Rindy

Arachnosquire
Old Timer
Joined
Jan 18, 2009
Messages
73
very nice..:drool: ...I feel like a bad T-mom, I just do a lid type water dish and a couple of rocks stacked so to make a hidey-hole...my enclosures are childish compared to yours
 

Spyder 1.0

Arachnoprince
Old Timer
Joined
Jan 7, 2007
Messages
1,014
same thing happen to one of my 10 gallon enclosures. The top shattered so i just replaced it with plexyglass. It was a good excuse for using more ventilation holes at least.
 

jbm150

Arachnoprince
Old Timer
Joined
Mar 18, 2009
Messages
1,650
Good looking tank! It'd probably be better off having the plexi in the top so that you can always add more ventilation holes if you need em.

Question though, how are you going to keep the crickets/roaches from crawling out of the holes at the base of the lid? Do you strictly tong feed?

Edit: Never mind, I see the space between the substrate and bottom of lid. It first looked like the holes were at substrate level. Nice tank again :)
 
Last edited:

curiousme

Arachnoprince
Old Timer
Joined
Dec 11, 2008
Messages
1,661
here are a couple of pics of the P. cambridgeii herself....... She is probably around 4" legspan.


curiousme

Arachnoprince
Old Timer
Joined
Dec 11, 2008
Messages
1,661
Good looking tank! It'd probably be better off having the plexi in the top so that you can always add more ventilation holes if you need em.

Question though, how are you going to keep the crickets/roaches from crawling out of the holes at the base of the lid? Do you strictly tong feed?

Edit: Never mind, I see the space between the substrate and bottom of lid. It first looked like the holes were at substrate level. Nice tank again :)
Yes, those holes are a bit low, but we monitor each prey item until it is eaten anyway. We have never just tossed in a few roaches in and left them for the T to find on its own. (where's the fun in that!)
 

curiousme

Arachnoprince
Old Timer
Joined
Dec 11, 2008
Messages
1,661
Yes, those holes are a bit low, but we monitor each prey item until it is eaten anyway. We have never just tossed in a few roaches in and left them for the T to find on its own. (where's the fun in that!)
Plus, we use B. lateralis roaches, so they can't climb smooth surfaces.
 

Mr. Gone

Arachnosquire
Old Timer
Joined
Nov 22, 2008
Messages
140
Update!

Today we finished with the plants. I decided to use philodendron for the first time, and got a start from my mom. I really liked working with it because of how well the leaves hook together. Basically each leaf comes off the main stem and bends at a 90 degree angle. Also we added a small sprig of wandering jew (the purple-ish plant up front) because we've had great success with it in our A. metallica enclosure.

From the front:


A little closer detail:


Down the rabbit hole:


From the top (with the ventilation holes that caused the setback):


Next post: re-housing (hopefully tomorrow)
 

curiousme

Arachnoprince
Old Timer
Joined
Dec 11, 2008
Messages
1,661
moving time!!

Today was moving day! It went smoothly, no sign of the speed it is capable of. It simply walked from one enclosure to the other.

Here is the old enclosure:


size comparison of old and new:


progression of it into the new enclosure:


We hope you have enjoyed these posts, we had fun making them! Plus, we love taking pictures and sharing them. :D
 

flamesbane

Arachnobaron
Old Timer
Joined
Dec 10, 2008
Messages
527
Both the T and the Tank are absolutely gorgeous! Do you have any problems with mold in tanks like that? All that organic matter seems like it could cause problems, so how do you prevent it?
 

Mr. Gone

Arachnosquire
Old Timer
Joined
Nov 22, 2008
Messages
140
Both the T and the Tank are absolutely gorgeous! Do you have any problems with mold in tanks like that? All that organic matter seems like it could cause problems, so how do you prevent it?
Thanks! We've been running a few enclosures like this for a while
(7 months) and what works for us is to never directly put water on the wood or bark background, make sure there's enough ventilation, and not over water the plants, "moist not damp" is what we go by.

We rarely mist. We always provide a wide water-dish, and directly put water in the soil occasionally. Together this seems to provide plenty of humidity without having to soak the soil to the extent molds could form. Also, using buried pots of more quick-draining soil/soil mixes for more finicky plants helps the water get to where you want it. This is the purpose of the gravel layer at the bottom as well; it provides a place for any excess water to go that isn't the soil/peat. Then any water can wick back into the drier parts of the soil more evenly to help prevent wet spots.

We also add isopods (rollie pollies), and the plants & microbial life take care of the rest!
 

curiousme

Arachnoprince
Old Timer
Joined
Dec 11, 2008
Messages
1,661
Update

So, this enclosure is still going strong and I thought I would update a bit! She has yet to molt in the enclosure, but she seems to be acting pre-molt. She was hanging out under the leaves on the left side of the stump, but has decided to move around behind the stump. Instead of a dirt curtain, she now has a dirt ceiling and will stay curled around the stump most of the time.

The plants are thriving though, so I thought I would post pics of them.


and here is a shot of her dirt ceiling(it is hard to capture clearly)


Thanks for reading! :D
 
Top